
- 如何实现一个命令行工具的npm包
- psrheartache
- #nodejs#npm
- 2018-03-12
- Wuhan,China
- 454
- 3 min read
# 如何实现一个命令行工具的npm包
我们平时会使用到很多的基于命令行的npm包,其中我们最熟悉的前端三大框架的脚手架,例如vue-cli 他们大致的工作原理是什么呢,今天来实现一个最基本的需求。
这样的结构图相信大家都见过
├──dist
│ ├──css
│ │ └──app.ae730c66.css
│ ├──js
│ │ ├──app.13838aa1.js
│ │ ├──app.13838aa1.js.map
│ │ ├──chunk-vendors.b4694ead.js
│ │ └──chunk-vendors.b4694ead.js.map
│ ├──favicon.ico
│ └──index.html
├──public
│ ├──favicon.ico
│ └──index.html
├──src
│ ├──assets
│ │ └──logo.png
│ ├──components
│ │ └──HelloWorld.vue
│ ├──App.vue
│ ├──inobounce.js
│ └──main.js
├──.browserslistrc
├──.editorconfig
├──.eslintrc.js
├──.gitignore
├──.prettierrc
├──babel.config.js
├──package-lock.json
├──package.json
├──README.md
└──vue.config.js
1
2
3
4
5
6
7
8
9
10
11
12
13
14
15
16
17
18
19
20
21
22
23
24
25
26
27
28
29
30
31
32
2
3
4
5
6
7
8
9
10
11
12
13
14
15
16
17
18
19
20
21
22
23
24
25
26
27
28
29
30
31
32
我们今天就来实现这个功能
# 搭建工程结构
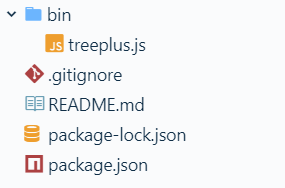
bin/treeplus.js
#!/usr/bin/env node
// 上面这句是必须得,指定执行环境是node
// 这里可以写什么你想要实现的业务
console.log('psrheartache)
1
2
3
4
5
2
3
4
5
# 执行
cd bin
.treeplus.js
> console.log('psrheartache')
1
2
3
4
2
3
4
这样执行起来比较麻烦,把路劲加入package.json的入口
{
"name": "treeplus",
"bin": {
    "treeplus": "bin/treeplus.js",
    "tp": "bin/treeplus.js"
  },
}
1
2
3
4
5
6
7
2
3
4
5
6
7
然后生成本地连接
npm link
1
这句话的主要目的是把当前的模块软链到全局npm环境,本地调试很方便。再只需要执行treeplus就能看到效果
# yargs模块
yargs模块能够解决如何处理命令行参数。
# 安装
npm install yargs --save
1
# 读取命令行参数
yargs模块提供了argv对象,用来读取命令行参数
#!/usr/bin/env node
let argv = require('yargs').argv;
console.log('hello ',argv.name);
1
2
3
2
3
hello --name=artirly
hello --name artirly
1
2
2
process.argv
[ '/usr/local/bin/node', '/usr/local/bin/hello4', '--name=artirly' ]
1
Argv
{
  name: 'artirly',
}
1
2
3
2
3
# 还可以指定别名
let argv = require('yargs')
.alias('n','name')
.argv
1
2
3
2
3
hello -n artirly
hello --name artirly
1
2
2
# 下划线属性
argv对象有一个下划线属性,可以获取非连词线开头的参数
let argv = require('yargs').argv
console.log('hello ',argv.n);
console.log(argv._);
1
2
3
2
3
hello A -n artirly B C
hello artirly ['A','B','C']
1
2
2
# 命令行参数的配置
[ ] demand 是否必选
[ ] default 默认值
[ ] describe 提示
#!/usr/bin/env node
let argv = require('yargs')
  .demand(['n'])
  .default({n:'artirly'})
  .describe({n:"你的名字"})
  .argv;
 console.log('hello ',argv.n);
1
2
3
4
5
6
7
2
3
4
5
6
7
这个代表n不能省略,默认值为artirly,并给出提示
option方法允许将所有的配置写入配置对象
#!/usr/bin/env node
let argv = require('yargs')
.option('n',{
    alias:'name',
    demand:true,
    default:'artirly',
    describe:'请输入你的名字',
    type:'string',
    boolean:true
}).argv
console.log('hello',argv.n);
1
2
3
4
5
6
7
8
9
10
11
2
3
4
5
6
7
8
9
10
11
有时候,某些参数不需要,只起到开关作用。可以用boolean指定这些参数返回布尔值
#!/usr/bin/env node
let argv = require('yargs')
    .boolean(['private'])
    .argv
console.log('hello',argv.n);
1
2
3
4
5
2
3
4
5
参数private总是返回一个布尔值
hello
false
hello -private
true
hello -private artirly
true
1
2
3
4
5
6
2
3
4
5
6
# 帮助信息
yargs模块提供以下方法,生成帮助信息
usage 用法格式
example 提供例子
help 显示帮助信息
epilog 出现在帮助信息的结尾
#!/usr/bin/env node
let argv = require('argv')
  .option('n',{
      alias:'name',
      demand:true,
      default:'tom',
      describe:'你的名字',
      type:'string'
  })
  .usage('Usage: hello [options]')
  .example('hello -n artirly','say hello to artirly')
  .help('h')
  .alias('h','help')
  .epilog('copyright 2018')
  .argv
1
2
3
4
5
6
7
8
9
10
11
12
13
14
15
2
3
4
5
6
7
8
9
10
11
12
13
14
15
# 发布
所有的业务处理完毕后就是发布到npm
npm publish
1
再发布的过程中得注意几点
- 确保已登录npm
- 确保npm的源路径是官方路径(是淘宝镜像的需要切回)
- 确保网络通畅
# treeplus
本人实现的treeplus github (opens new window)
# 使用示例
# 指定参数,排除单个目录
$ tp -i node_modules
1
2
2
# Returns
├──bin
│ └──treeplus.js
├──package-lock.json
├──package.json
└──README.md
1
2
3
4
5
6
2
3
4
5
6
# 指定参数,排除多个目录
$ tp -i node_modules bin
1
2
2
# Returns

├──package-lock.json
├──package.json
└──README.md
1
2
3
4
5
2
3
4
5
# 指定参数,只打印文件夹
$ tp -d
1
2
2
# Returns

├──bin
1
2
3
2
3
# 指定参数,打印指定的层级,参数大于0
$ tp -l 1
1
2
2
# Returns

├──bin
1
2
3
2
3
# 多参数结合使用
$ tp -d -l 2 -i node_modules
1
2
2
# Returns

├──bin
$ tp
1
2
3
4
2
3
4
# Returns

├──bin
│ └──treeplus.js
├──node_modules
│ ├──.bin
│ │ ├──index.js
│ │ ├──LICENSE
│ │ ├──package.json
│ │ ├──README.md
│ │ └──yargs.js
│ ├──yargs-parser
│ │ ├──lib
│ │ │ └──tokenize-arg-string.js
│ │ ├──CHANGELOG.md
│ │ ├──index.js
│ │ ├──LICENSE.txt
│ │ ├──package.json
│ │ └──README.md
├──package-lock.json
├──package.json
└──README.md
1
2
3
4
5
6
7
8
9
10
11
12
13
14
15
16
17
18
19
20
21
22
2
3
4
5
6
7
8
9
10
11
12
13
14
15
16
17
18
19
20
21
22
完